I made a walker banner/sleeve for my mother a few weeks ago.
 |
| Our daily afternoon ritual starts with a cup of coffee, either on the front 'porch' or sitting at a large window inside, depending on the weather. |
It's been my intention to have quilt blocks that will hang below her name, secured between the magnets, that can be changed out every month--one or two blocks to evoke or commemorate whatever is usually associated with that month. January will include something about her birthday; New Year's Day seems an obvious choice as well.
In case this set-up isn't obvious: Foundation Paper Piecing is going to feature heavily in this project.
I went on the interwebs in search of a FPP pattern (free, preferably) that would evoke fireworks. I found one! I was happy to exchange my (burner/junk mail) email address for this pattern and her blog tutorial.
Ruth's step-by-step tute is great, but I've been tweaking some of the steps as I go. A new-to-me technique is to fold back the pattern and create a seam allowance/straight edge for the next piece to line up with. But rather than create a fold at the line as the block is being created...
... I chose to create a crease at each line before I started sewing down/on fabrics--less stuff to manipulate that way. I also creased along the three outside edges--this extra step was well worth the time and effort.
I totally agree with her use of thin cardboard to aid in the folding over. It's a great time-saving tool. While folding 16 pattern pieces it occurred to me that the fold doesn't have to be uber accurate. Its purpose is to help establish a seam allowance. The accuracy of the block depends on the stitching, not the folding!
The next two tweaks were to use pins instead of glue to secure the first piece (mainly because I don't have a glue stick right now), and to cut away the paper at the point where all lines come together.
As you can see, there's a preponderance of stitches at this convergence ...
The final thing I found very valuable was to have an uncut version of the pattern on hand as an assembly guide, and to remember that nothing was going to make sense right-side up. Try as I might, this finished triangle wasn't going to match anything on the pattern with the "pretty" side up.
But once flipped, it's obvious where it fits in the block (the fact that it's labelled "B" doesn't hurt, either).
One block down, one to go (I'm making the seasonal/monthly additions double-sided).
Ruth suggests cutting a 6" square of background fabric, then cutting it on the diagonal to create two triangles to use for the construction of two segments. I started with 6 squares (12 triangles) and it turns out I needed 7 triangles to complete a block (8 segments). That's pretty close to her estimate, but all the same I'm glad I didn't cut out all 8 squares/16 triangles at the beginning of this project. I've still got enough of the background fabric to finish a second block, but when it comes to the final two segments, I'll play it by ear and try to be as non-wasteful as possible.
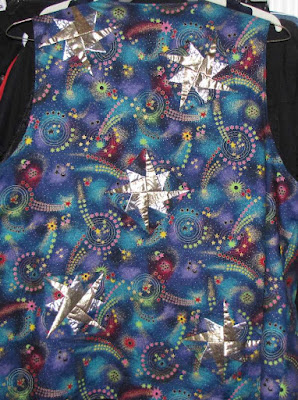
Along with this flashy, splashy blue fabric, I'm using up scraps of silver and gold lamé I have on hand, I'm guessing the results of this store sample from when I worked at a quilt store (the vest was promoting 2 FPP star patterns). I was hoping I had more of the fabric on the left, but now that I've finished one firework block, I quite like the blue I ended up using.
Each firework segment takes 6 passes under the needle to complete, as does every Leader-Ender block, so by the time I've finished a fireworks FPP block, I've finished eight to nine L-E blocks as well. Good progress!
Did you notice the green pad under the iron in one of the top pictures? That was something made for the Har-Benito Bee mates by one of the husbands. I think all we had to do was supply 3/4 yard of fabric and pay something like $20, and we got back a 'book' made of two pieces of plywood, one of which was padded for ironing purposes, and when you opened the 'book' this was inside:
That's fine-grain sandpaper on the left, perfect for holding fabric securely while writing on it (signature blocks, labels, etc.) I use this nifty thing constantly, with fond memories of the ladies in that Bee.


For scraps I'm a fan of folding on the line and then using a cutter and ruler to chop off the excess, when I'm making something planned I'll cut the fabric to the right shape if a little oversize.
ReplyDeleteYep, that's exactly the procedure I learned through this project. Even with that, there's still the feeling of doing everything upside-down and backwards!
DeleteC
On the (rare) occasions that I make a lot of the same paper-pieced units (like New York Beauty) I've found it helpful to use a cutting template to rough-cut the patches. But most of the time I cut a few pieces that turn out to be too small so I then compensate by cutting the next pieces over-large.....All that said, your seasonal accessories for the walker bag are a great idea.
ReplyDelete